Restoring a 1968 Porsche 911L - The Engine

The car came with a running motor although it didn't run all that great, infact when we brought it home it didn't run at all! Anyway, we spent close to 4 months completely refinishing the fuel and intake systems and got the motor running (this was during the winter!). We took the time to drive it around and have some fun before we got to the actual "restoration". We later found that the motor was not original and so decided to sell it and use the proceeds to buy a "correct" year motor (since 68' was a unique year). We found a perfect 1968 911L "core" on Ebay and purchased it in Jan of 2003. Turns out the motor was only a few engines away from the engine number that should have been in the car originally and as luck would have it, the case turned out to be the early sand cast alloy and not the later magnesium. We have since broke it down and sent it to Jay's Precision Machine in Santa Clara, CA for all of it's machine work. We originally knew Jay through my Father's "one lung" old engine club but Jay's actuall claim to fame is being Jerry Wood's machinist! Neadless to say, were in good hands. Since the later 911T models of 69' had even less horsepower than the 911L, we don't think that 130hp is all that bad although since the pistsons will be replaced with the higher compression JE units, it's probably likely that we will see roughly 145hp. My father will rebuild the motor while Rick and I finish the paint and bodywork. Enjoy.

DSCN1741.JPG DSCN1748.JPG DSCN1804.JPG
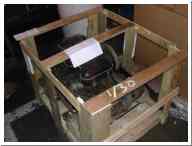
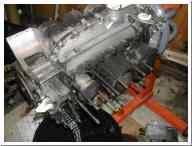
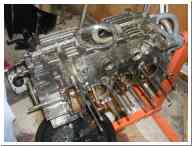
Here is our new motor on the shipping dock just after arriving. 
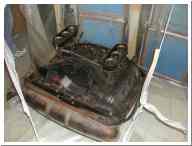
Here is the "new" motor after we got it off it's crate and removed the cooling fan. Getting started. Had to resort to drilling out a heat exchanger nut on the right side. One exchanger stud will need to be replaced.
DSCN2101.JPG DSCN2102.JPG DSCN2106.JPG
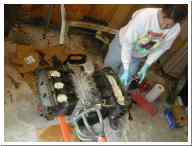
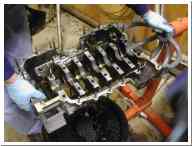
Rick get's started on the valve covers. 
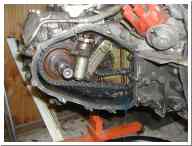
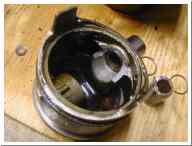
Left side chain tensioner. This engine is unique in that a pulley is mounted to the left cam to drive the smog pump. We will restore all this to "non-operational" but visually correct. 
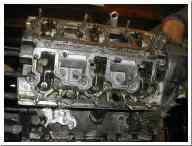
Valve covers off so we can get to the head nuts.
DSCN2114.JPG DSCN2136.JPG DSCN2138.JPG
Draining more oil and removing the chains. Ooops! Our Ebay engine wasn't totally perfect but it was a good core. A piston pin in piston 6 snapped taking out the boss with it. Ouch! Lucky for us there was minimal damage to the case. #6 rod was bent slightly but Jay was able to straighten it. Here is a shot looking through the spigot of cylinder 6. Looks like that piece of piston boss ate the metal up a bit but it's still in pretty good shape. Jay told me later that it all looked fine with no major damage.
DSCN2121.JPG DSCN2143.JPG DSCN2155.JPG
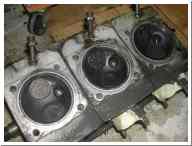
Heads. The air injection nozzles will be made "non-operational". Almost done. It's empty. The parts are now with Jay Robinson at Jay's Precision Machine in Santa Clara for machine work.


Back to the Main page